Contact@prince2training.co.uk
 01344203999


 Back
Back
Table of Content

19-Jun-2026

Veronica Davis
Every great achievement starts with a single step, but it is the map that ensures we reach the destination. In an industry where timing is everything, Project Timeline outlines the critical path to victory. It highlights our key dependencies, ensuring we anticipate risks and deal with them beforehand. It is a roadmap from the initial spark to the final, triumphant launch.
In this blog, we will discuss What is Project Timeline, explore its types, and explain how to create one effectively. By the end, you will have the clarity and confidence to plan projects with precision and keep every milestone on track.
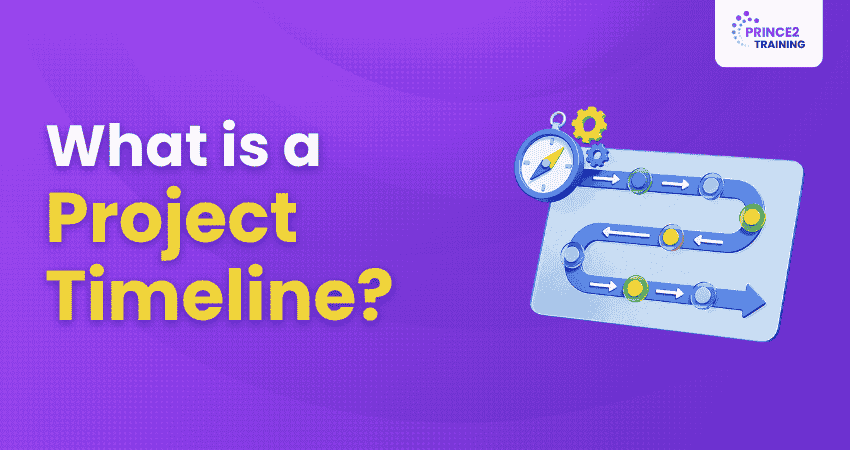
What is a Project Timeline?
A Project Timeline is a visual representation of a project schedule that shows tasks, milestones, start and end dates, and dependencies from the beginning to the completion of a project. It provides a clear roadmap that helps teams plan activities, allocate resources, monitor progress, and ensure the project stays on schedule.
A Project Timeline further divides the project into smaller tasks and assigns deadlines to each activity. This framework gives the team a clear understanding of how to execute the project and manage timelines effectively.

Key Components of Project Timeline Planning
Creation of an effective Project Timeline requires several key components. Let us look into those components:
1) Project Goals and Objectives
Project goals provide clear direction and define the outcomes required for successful project delivery. These elements ensure that the project aligns with its intended purpose and expected results. The team also gains a clear understanding of project priorities and success criteria.
2) Start and End Date
Start and end dates define when each task or phase begins and finishes. Establishing clear timelines helps teams prioritise work, manage workloads, and maintain realistic expectations. Accurate scheduling also reduces delays and improves coordination across different project stages.
3) Time Management and Deadlines
Time estimation supports effective time management by providing clarity on resource availability, task duration, and potential delays. Deadlines, on the other hand, are assigned by Project Managers, so teams clearly understand when and how tasks should be completed within the planned timeline.
4) Project Deliverables and Milestones
Milestones are significant points or achievements within the project that mark the completion of major tasks, phases, or deliverables within the timeline. They make it easier to track progress, monitor performance, and determine whether the project is on schedule. Stakeholders can also clearly understand when key results are expected.
5) Resource Allocation
Properly assigning people, tools, and budget ensures that every task has the resources needed to stay on track. Effective resource allocation within the timeline clarifies responsibilities and resource requirements early. This helps reduce risks, balance workloads, and maintain project efficiency without delays or burnout.
6) Regular Updates and Feedback
Regular feedback and timeline updates help the Project Manager respond to changes, incorporate new information, address delays, and manage stakeholder expectations. These updates ensure the team stays informed about potential challenges so they can adjust resources, schedules, and deadlines as needed.
Master the foundation of successful projects with our course in Prince2® Foundation Training - Join Now!
Types of Project Timelines
Different projects have different timelines. Depending on the complexity and scope, teams can choose the most suitable timeline type. Below is a list of common types of Project Timelines:
1) Gantt Charts
Gantt Charts are bar charts that visually represent tasks, their time periods, and task dependencies. This type of timeline is very effective for projects that are complex, require completion in multiple phases, and involve interdependent activities.
2) Kanban Boards
Kanban Boards arrange tasks into columns representing different workflow stages, such as To Do, In Progress, and Done. This helps the project team gain a clear overview of project progress by providing a structured visual workflow.
3) Roadmaps
Roadmaps are a type of Project Timeline that provides a high-level visual representation of project progress. They usually focus on strategic goals and major milestones. This format emphasises direction and priorities, giving clarity on how short-term tasks align with long-term objectives.
4) Calendar-based Timelines
A Calendar-based Timeline organises tasks and deadlines into a grid format. It is an ideal tool for short-term projects or event planning, ensuring that specific dates and timing remain the primary focus for the entire team.
5) Linear Timelines
Linear timelines present tasks in a straightforward, sequential format. This layout is particularly effective for managing smaller projects that involve minimal dependencies. It ensures that progress is easy to track and the project remains focused on its primary objective.
How to Create a Project Timeline?
Once you've defined your project goals, the right planning approach will help you organise, track, and manage progress effectively. Keeping your team aligned ensures high-quality results, so follow these steps to create a detailed timeline for your next project.

Step 1: Define the Project Scope and Objectives
Start by clearly defining the project's scope, goals, and expected outcomes. This step ensures that everyone understands what the project aims to achieve and sets the foundation for building an accurate and realistic timeline.
Step 2: Define Project Tasks
When adding tasks, include key details like a summary, description, owner, priority level, and deadlines. You can also use labels or components to keep everything organised. For a faster setup, Jira's Rovo uses AI to help manage these details for you.
Step 3: Identify Task Dependencies and Sequence Activities
Schedule and organise tasks by dragging them across the timeline view, then align them with their larger epics. By mapping out task dependencies, you ensure everyone understands the flow and stays focused on the right priorities.
Step 4: Assign Tasks to Team Members
Assign team members to tasks while balancing workloads to prevent burnout or scheduling overlaps. You can also use AI-driven automation to delegate tasks or break them down by effort, ensuring your resources are used as effectively as possible.
Step 5: Share the Timeline
Export your roadmap directly to keep stakeholders in the loop. Use comments and @mentions to share updates, ask questions, and keep the conversation moving.
Step 6: Track Progress and Make Adjustments as Needed
Monitor your project's progress against the timeline and make adjustments as needed. By tracking actual work against your plan, you can quickly spot delays and take corrective action to keep everything on schedule.
Benefits of Project Timeline
A Project Timeline is not just a framework; it enhances the accuracy and efficiency of the project. So here are some core benefits of Project Timeline:
1) Better Clarity and Organisation
One of the major benefits of a Project Timeline is the clear structure it provides by breaking complex projects into smaller, manageable tasks. It helps the team understand schedules, deadlines, and project requirements more clearly. This organised workflow ensures everyone knows their responsibilities and expected deliverables.
2) Clear Communication
A Project Timeline acts as a central reference point that brings all project details together, reducing the chances of miscommunication. It strengthens communication within the team and supports early identification of potential risks and issues. This improved communication ensures that everyone remains aligned with project objectives.
3) Improved Team Collaboration
A Project Timeline supports effective collaboration by providing a shared view of tasks, deadlines, and milestones. Team members can clearly see how their work contributes to the overall project, which encourages coordination and teamwork toward achieving common goals.
4) Optimised Resource Allocation
Projects involve various resources such as budget, personnel, tools, and equipment, and the Project Timeline helps ensure these resources are allocated efficiently. Proper resource allocation helps prevent resource shortages, reduce waste, and balance team workloads effectively.
5) Efficient Progress Tracking
By dividing the project into smaller tasks, the Project Timeline makes it easier to monitor progress and measure performance against planned milestones. It helps teams identify delays early, address issues quickly, and keep the project on schedule.
Blend structure with flexibility with our PRINCE2 Agile® Foundation & Practitioner Training - Register now!
Examples of Project Timeline
Below are the examples of Project Timeline:
Project Timeline for Software Development
Here, we will consider the scenario of building a mobile app and apply a Project Timeline to this project. Below are the key phases required to develop and launch the application:
1) Weeks 1–2: Setting the Foundation
We'll start by meeting with stakeholders to clearly define the app's requirements and objectives. Once alignment is achieved, we'll develop a detailed project plan and obtain stakeholder approval.
2) Weeks 3–6: Design and Prototyping
This phase focuses on shaping the application's design and user experience. The team will create interface designs and develop a functional prototype to test usability before development begins.
3) Weeks 7–12: Development
The main development work takes place during this stage. Developers will build core functionalities, integrate required features, and connect external services such as payment systems or location services. By the end of this phase, the team will deliver a working beta version of the application.
4) Weeks 13–16: Testing and Quality Assurance
During this phase, the team will conduct thorough testing to identify and resolve defects. User testing will also be performed to ensure the application is reliable, user-friendly, and ready for release.
5) Weeks 17–18: Deployment and Launch
In the final phase, the team will prepare release documentation, finalise deployment activities, and launch the application. Once all requirements are verified, the application will be released to users.
Launching the Marketing Campaign
For this example, we will consider the scenario of launching a marketing campaign. Below are the key steps involved in executing this project:
1) Weeks 1–3: Creative Strategy
First, we will identify the target audience and define campaign objectives. The creative team will then spend time developing campaign visuals and messaging that align with the overall strategy.
2) Weeks 4–5: Preparation
During this phase, the team will set up campaign infrastructure, build landing pages, schedule the social media calendar, and prepare email sequences so that all campaign elements are ready for launch.
3) Weeks 6–9: Campaign Execution
This phase involves launching advertisements, initiating influencer outreach, and running promotional activities to increase audience engagement. The campaign will be actively monitored throughout this period to ensure consistent performance.
4) Weeks 10–11: Performance Analysis and Optimisation
Once the campaign gains traction, the team will analyse performance data, identify areas for improvement, and make necessary adjustments to enhance results. The phase concludes with a final performance report summarising campaign outcomes.
Build strong Project Leadership skills using proven PRINCE2 methods and practices. Register for PRINCE2 Training now!
Best Practices for Managing Project Timeline
Some of the best practices are mentioned below for managing project timelines:

1) Establish Clear Milestones and Deadlines
Define specific checkpoints and realistic deadlines based on task complexity and resource availability. These milestones act as progress markers, helping you assess project status and achieve key goals on time.
2) Divide the Project into Manageable Tasks
Break the overall project into smaller, well-defined work packages with clear deliverables and individual timelines. This structured approach makes it easier to assign resources, manage risks, and ensure that no critical activity is overlooked.
3) Map Task Dependencies and Constraints
Identify which tasks must be finished before others can begin to create an accurate and logical workflow. Recognising these relationships early helps optimise the project schedule and prevents conflicts that may cause delays.
4) Strategic Resource Allocation
Assign team members, equipment, and budget according to task requirements to avoid resource shortages or waste. Efficient allocation ensures that deadlines are met while maintaining balanced workloads and adequate funding for critical tasks.
5) Utilise Project Management Software
Digital tools such as Gantt Charts or Kanban Boards help teams visually track progress, deadlines, and responsibilities. These platforms allow for real-time updates and provide a centralised view that keeps everyone organised and informed.
6) Set Grounded and Achievable Timelines
Consult with team members and stakeholders to create a schedule that is challenging but realistic and achievable. This helps avoid overly ambitious deadlines that may cause unnecessary pressure or increase the risk of project delays.
7) Maintain Regular Progress Monitoring
Schedule regular check-ins and monitor progress consistently to identify potential delays before they escalate into major problems. This proactive approach allows teams to make timely adjustments and keep the project moving forward.
8) Incorporate Flexibility and Buffer Time
Include buffer time in the schedule to absorb the impact of unforeseen issues or minor setbacks. This flexibility ensures that a small delay in one task does not disrupt the entire Project Timeline.
9) Communicate Transparently with Stakeholders
Provide consistent updates to stakeholders regarding progress, challenges, and any necessary changes made to the Project Timeline. Maintaining open communication ensures expectations remain aligned and builds trust throughout the project lifecycle.
10) Document Every Change and Decision
Maintain a detailed record of all timeline modifications and the reasoning behind each adjustment. This documentation supports accountability and provides valuable insights for improving planning in future projects.
Conclusion
A Project Timeline provides a structured approach for managing project progress and ensuring tasks are completed efficiently. It helps divide the project into smaller tasks so that each team member clearly understands their responsibilities and workload, preventing individuals from becoming overworked or overwhelmed. The timeline ultimately keeps project objectives aligned, supports effective coordination, and ensures the timely and successful completion of the project.
Apply Agile with confidence and control with our course PRINCE2 Agile® Practitioner Training - Join now!
Frequently Asked Questions
What are the Six Phases of Project Management?
Based on traditional models, particularly in construction and software development, the six phases of Project Management are: Initiation, Planning, Design, Development, Implementation, and Closure.
What are the Five Project Milestones in Project Management?
In Project Management, milestones are key checkpoints that mark significant progress or deliverables. Common project milestones may include Project Approval, Requirements Completion, Design Approval, Major Deliverable Completion and Final Project Handover.
What is the Difference Between a Project Schedule and Timeline?
A Project Schedule is a detailed, actionable plan containing tasks, durations, resources, and dependencies, whereas a Project Timeline is a simplified, linear, visual representation of key milestones and events.

 Continue Browsing